Building a CMS Powered Blog With Create React App and Netlify
Thu Dec 29 2022This guide will show you how you can setup your own blogging website using Create a React App and Netlify. We take advantage of Netlify's easy to use CMS and hosting platform, and Create a React Apps flexibility. This makes the setup as simple as possible so you can start blogging immediately, while still allowing room for further customization and adding new features to your Web App.
Architecture
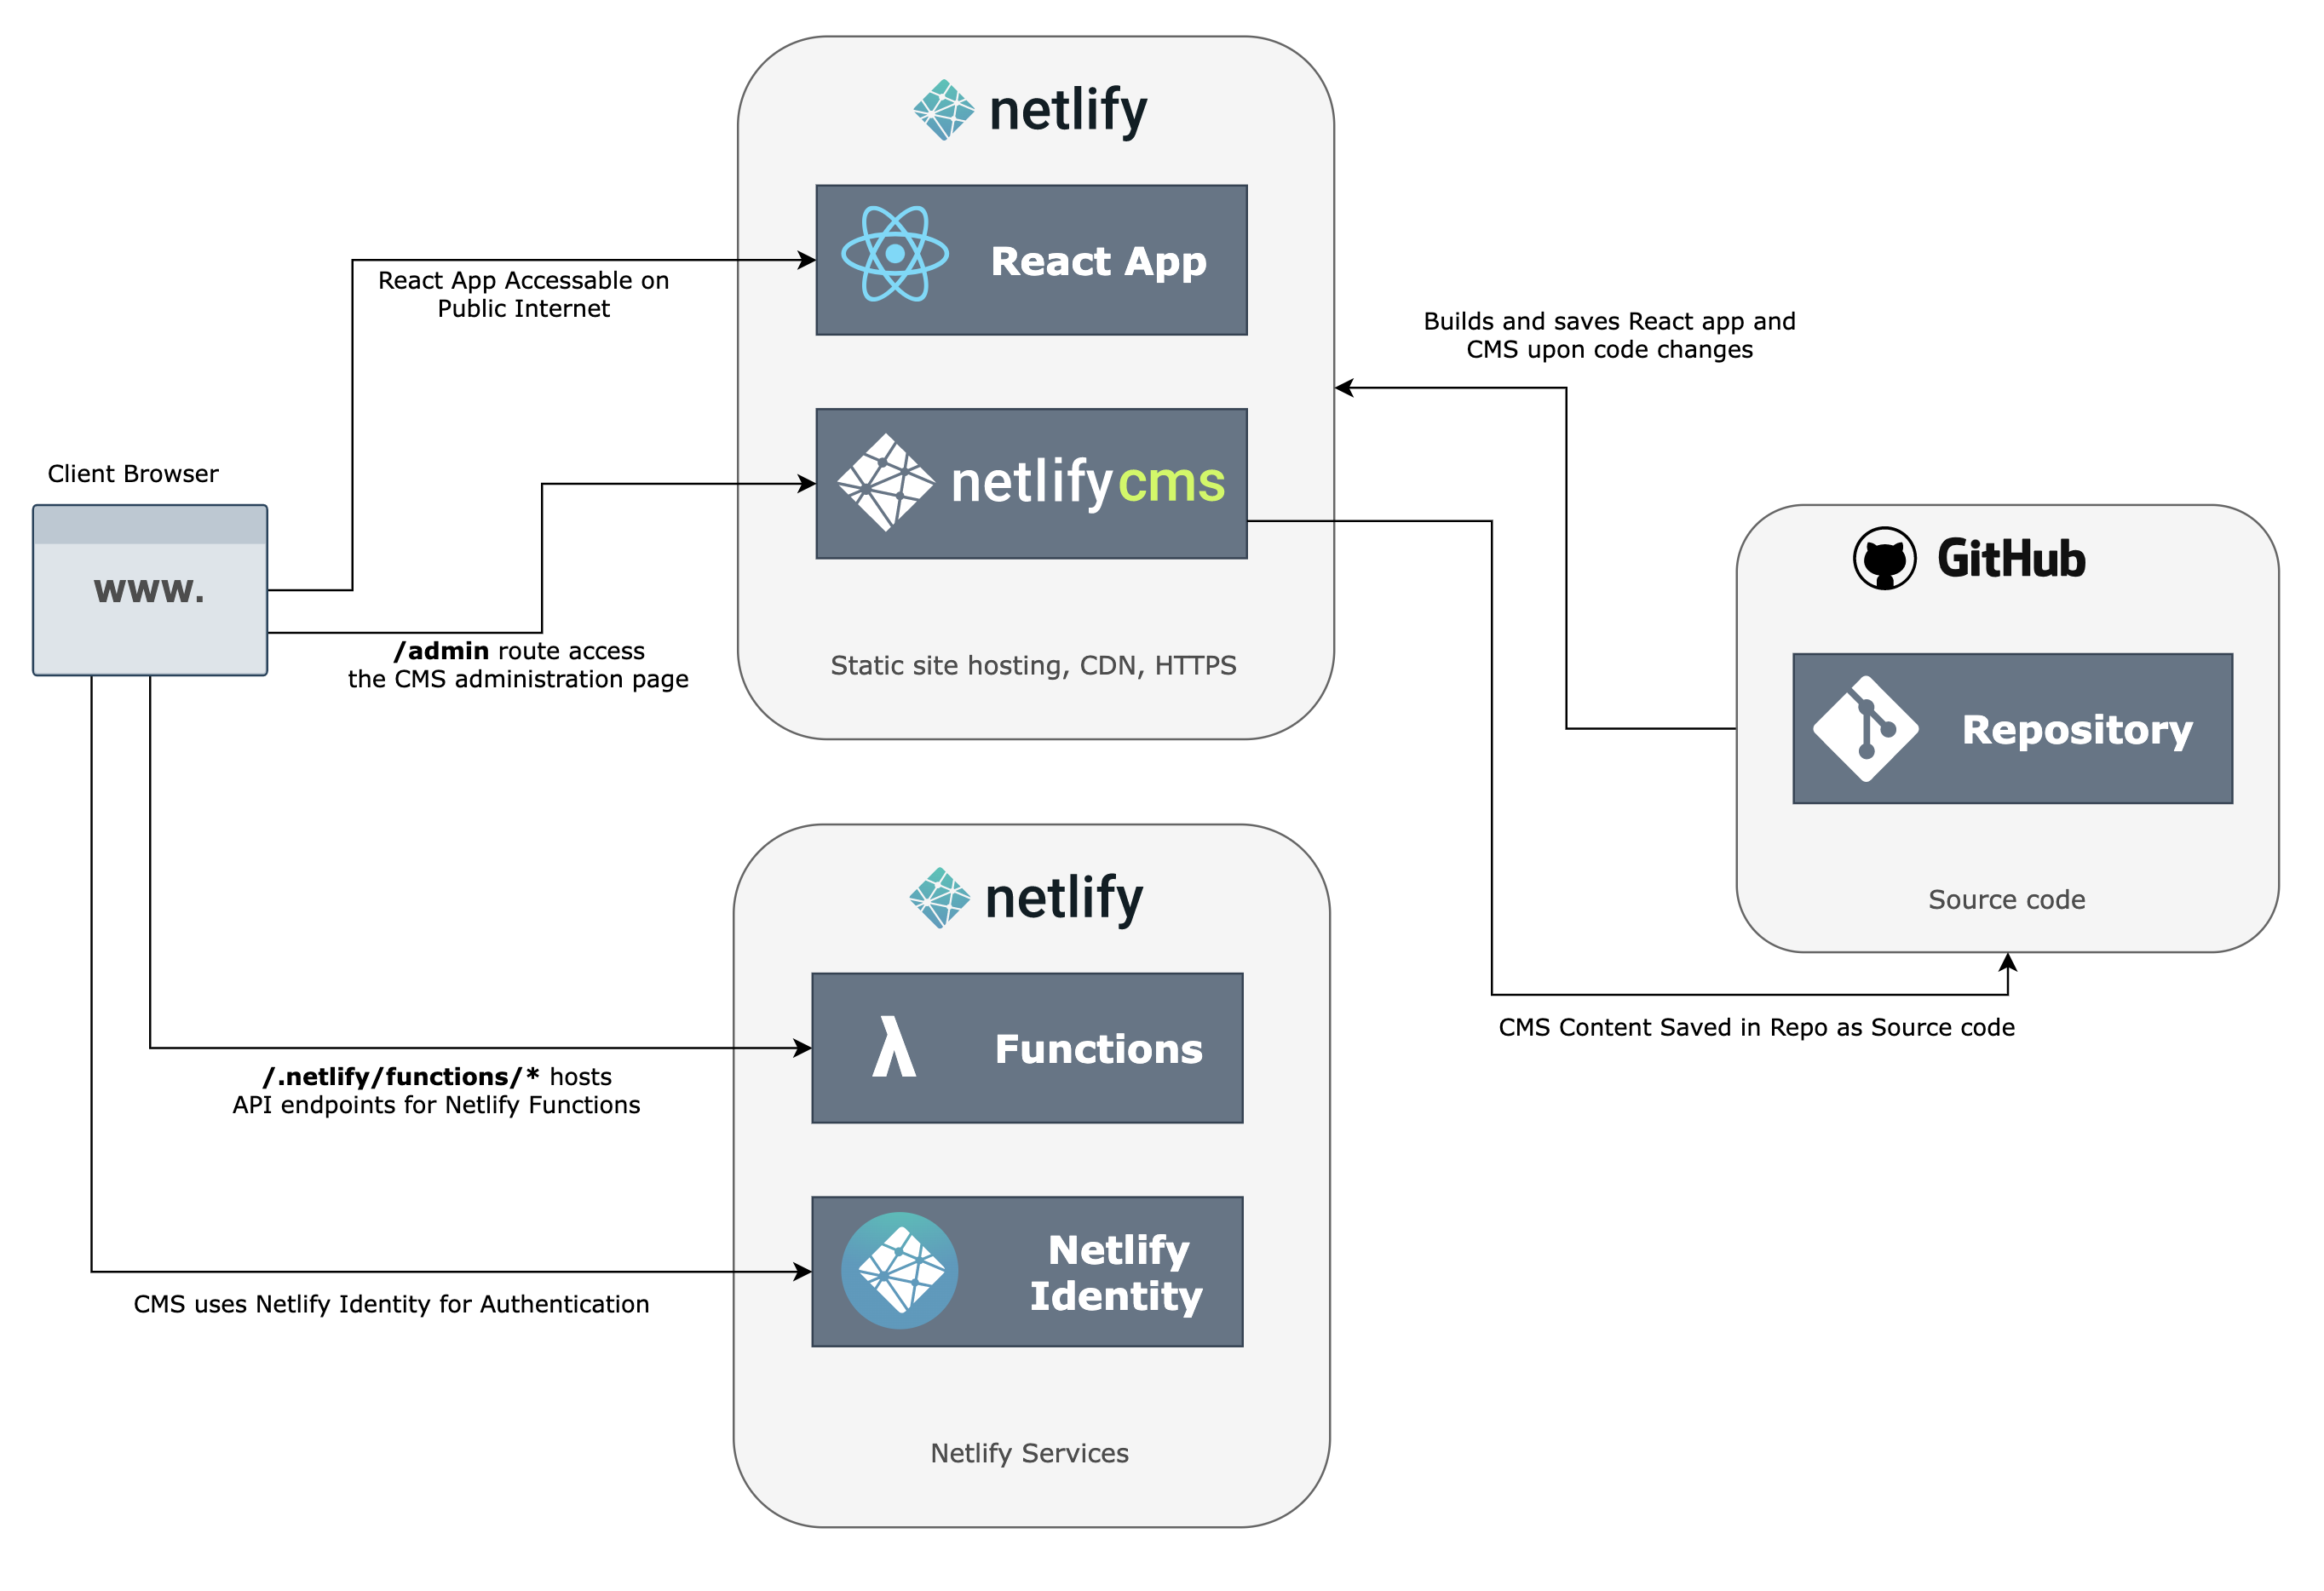
- Github as acts as the repository and version control tool for all our code
- Netlify hosts the static Web Assets and makes your Application publicly accessible. The following are hosted:
- Main webpage (includes Landing Page and Blogs) is written in React
- Web page embedded with Netlify CMS UI is hosted
- Netlify Identity is used so the owner of the application can login and use the Netlify CMS securely
- Netlify Functions is a feature that makes it easy for you to set up JS functions that can be triggered by an API request
- When the user makes changes/adds new application content via CMS, Netlify publishes those changes directly to Github (this is important, since traditionally CMS' save data to a database, but here Netlify saves the data within source control)
Getting Started
Here's how you can set up and use this Application for your self
Step 01: Copy Repo to Github
Clone or fork https://github.com/gugzkumar/create-react-app-with-netlify-cms
Step 02: Create a Netlify Account
Create an account in Netlify if you don’t have one
Step 03: Set up your site in Netlify
Follow the instructions in https://docs.netlify.com/welcome/add-new-site/ for importing from an existing repository. Use your github repository from step 1.
For build settings you can use the following:
- Base directory: root of the project (you can leave this blank)
- Build command:
npm run build - Publish directory:
build
From here, feel free to choose your own domain, and secure the website with https.
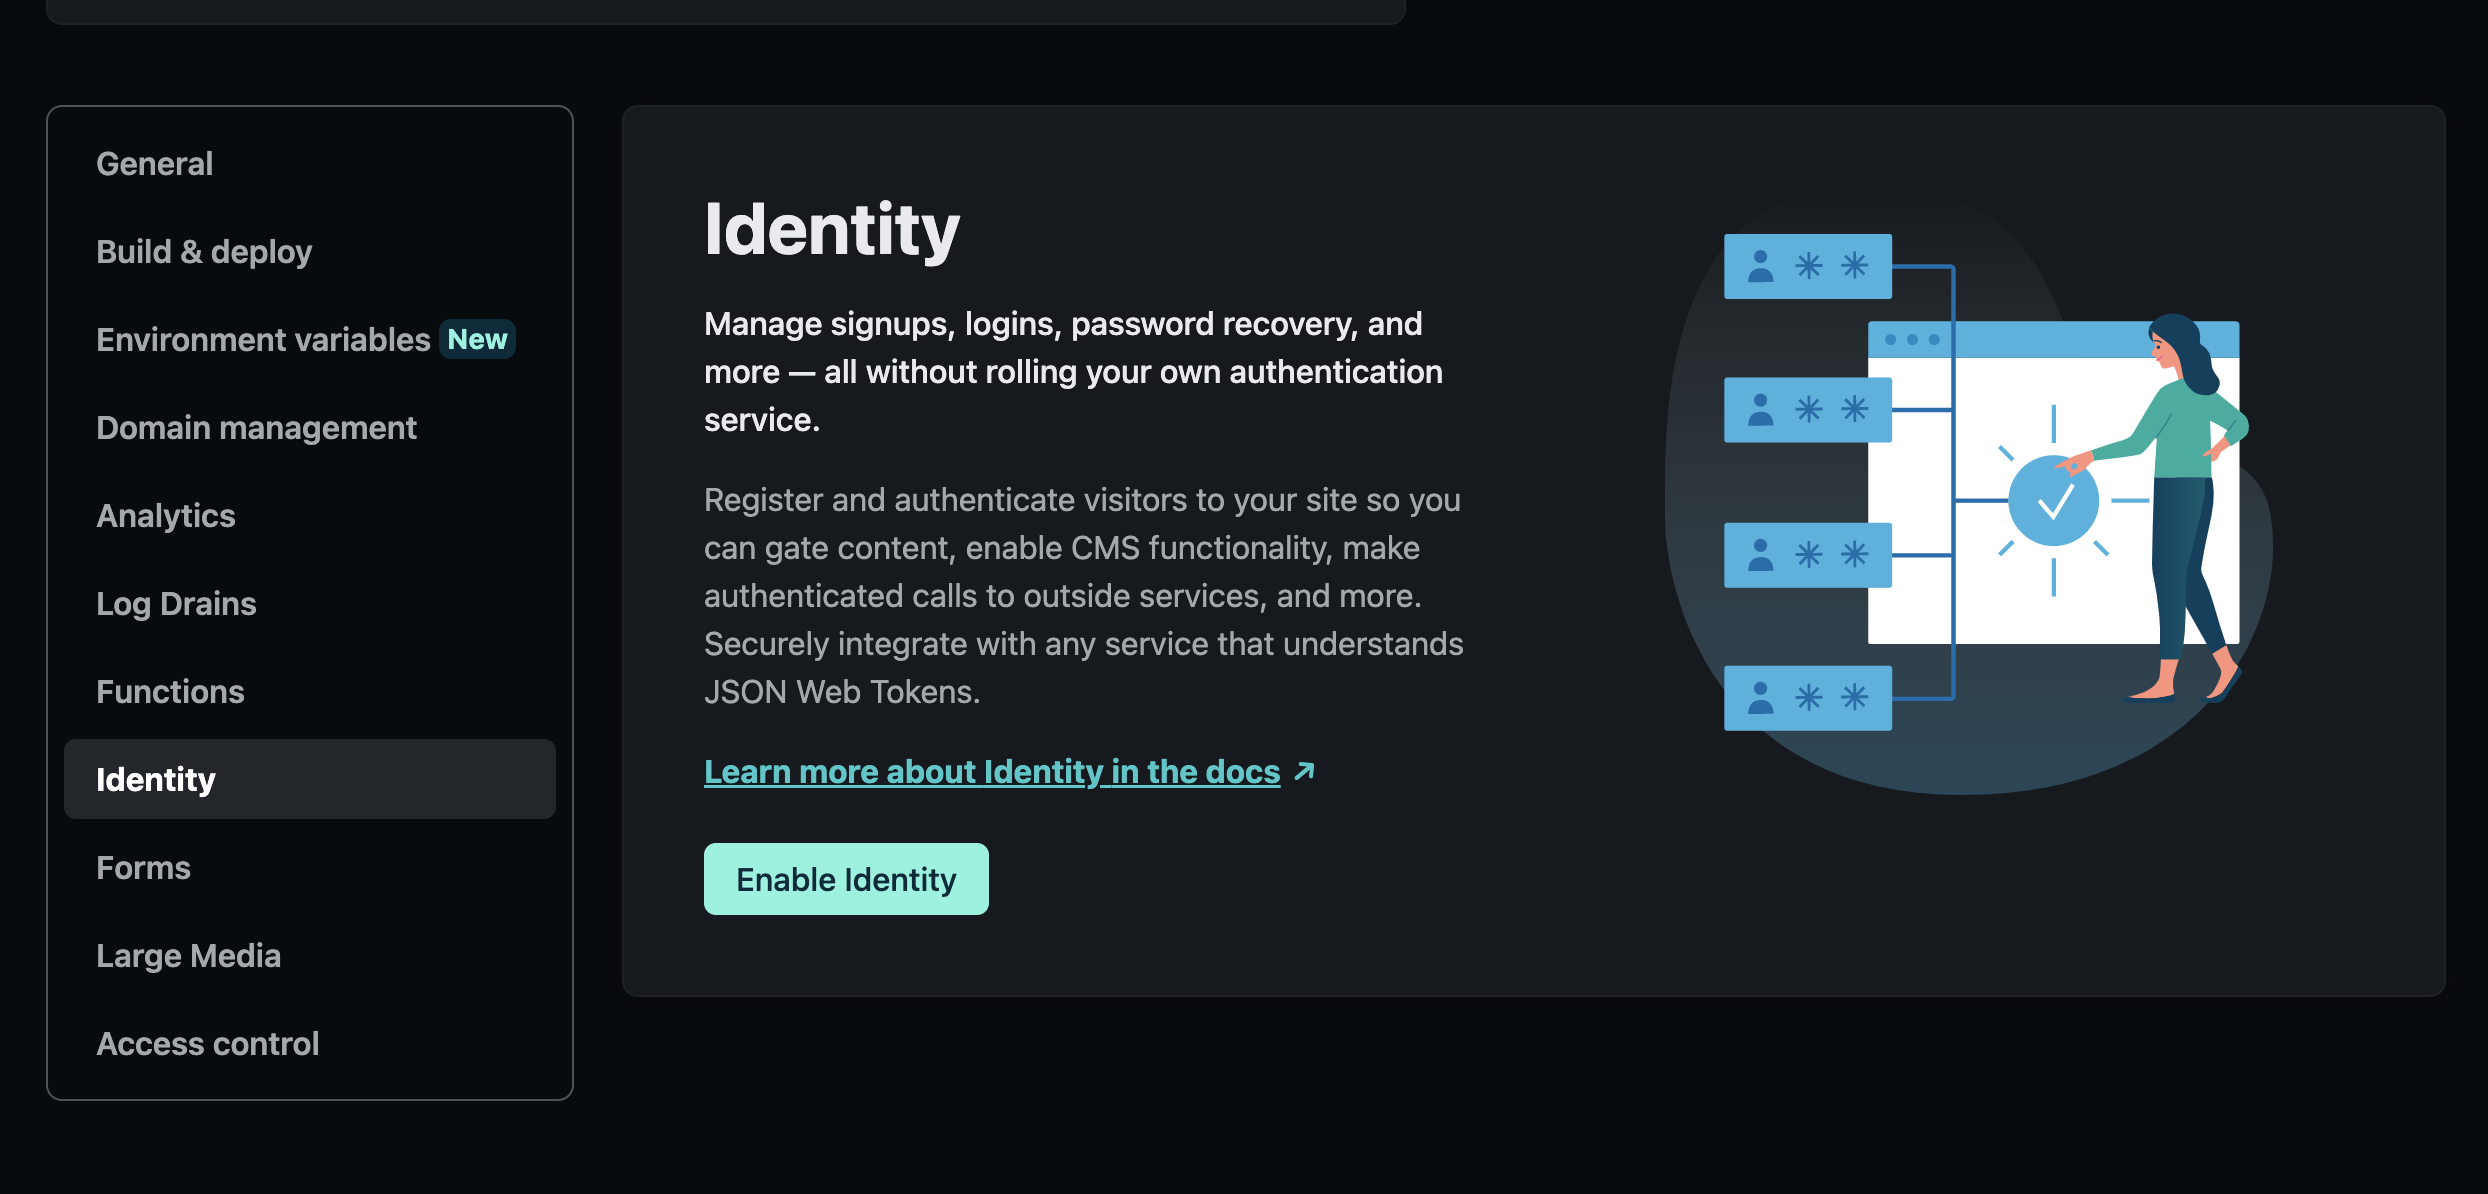
Step 04: Set up Netlify Identity
Once your site is up and running, go to you site settings and enable Netlify Identity. Then scroll all the way down and enable git gateway.
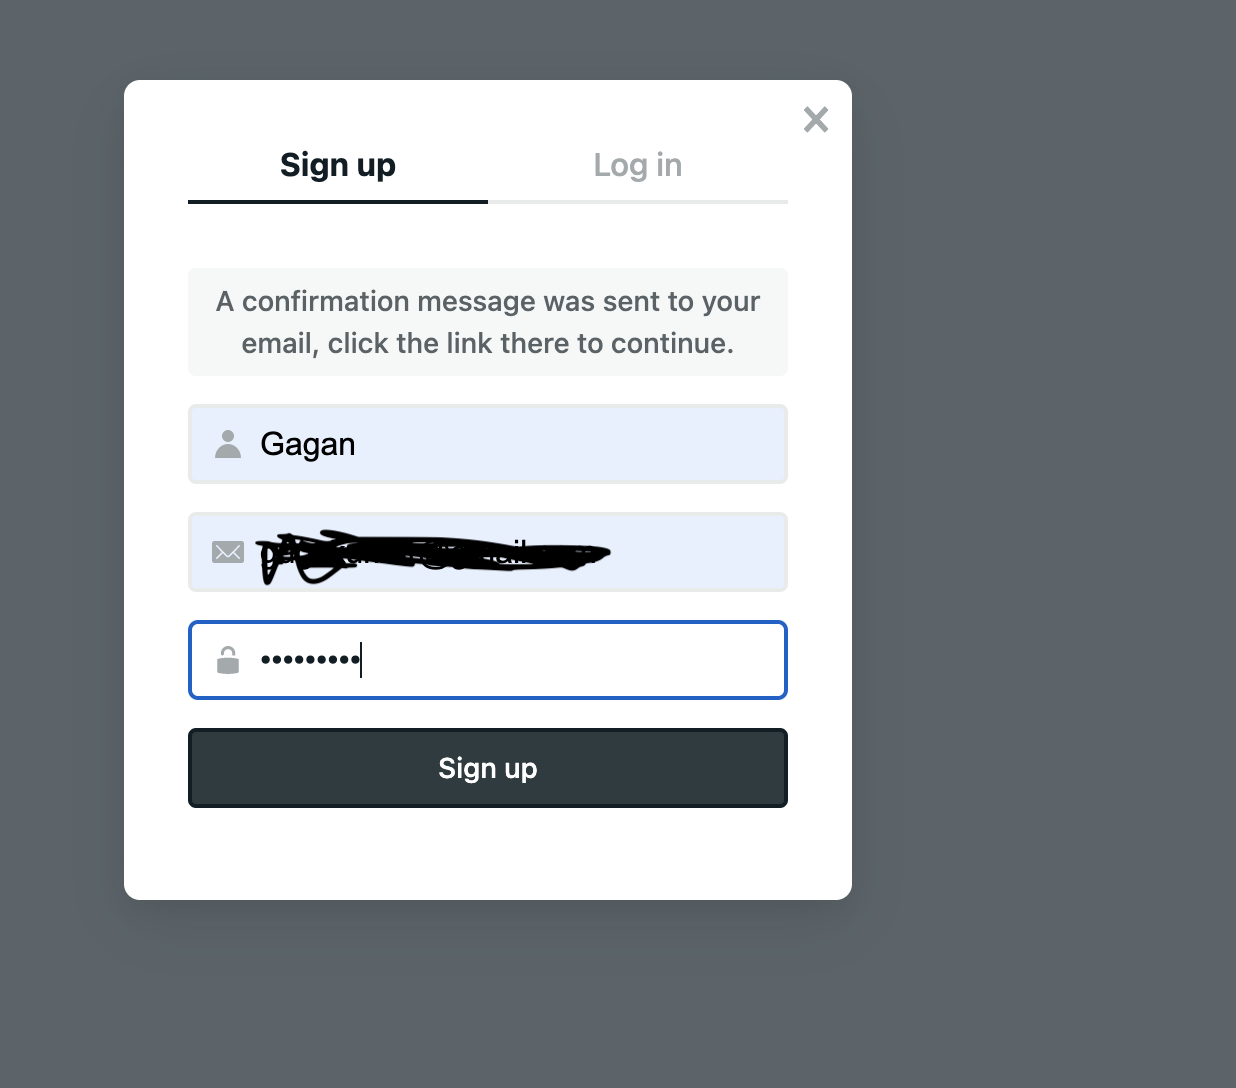
Got to https://[your_website_name].netlify.app/admin sign up for account. Confirm it. Now you can log in and use the Netlify CMS. Try adding a new blog.
Finally go and disable sign ups for your website in the Netlify Identity settings.
Using and Adding New Features
Folder Structure
├── cmsContent/
│   └── blogs/
│       ├── *.json
├── netlify/
│   └── functions/
│       └── *.js
├── public/
│   ├── admin/
│   │   ├── config.yml
│   │   └── index.html
│   ├── content/
│   ├── images/
│       └── *.js
│   ├── _redirects
│   └── index.html
├── src/
│   ├── cmsConfigs/
│   ├── components/
│   │   ├── Footer/
│   │   └── Header/
│   ├── pages/
│   │   ├── Blogs/
│   │   └── Landing/
│   ├── styles/
│   │   ├── Button.js
│   │   ├── consts.js
│   │   └── theme.js
│   ├── App.js
│   └── index.js
├── buildCMSContent.js
├── netlify.toml
└── package.json
If you are familiar with Create a React App, then a lot of the files should be familiar to you. I suggest you do read its documentation, since it can help you with this app too. I won't describe the purpose of ever file and folder, just the one's I think are important to know and may not get covered in Create a React App.
- cmsContent/: where CMS content is saved
- netlify/functions/: houses JS Functions hosted by netlify functions
- public/: hosts static assets
- public/admin/config.yml: Netlify CMS' configuration file
- public/content/: build directory for all CMS content
- public/images/: where CMS images are saved
- src/: source code for react app
- src/cmsConfigs/: where CMS content meta information is preprocessed and saved so it can be used by react
- src/components/: where dumb/shareable React components are saved
- src/pages/: where Page specific components are saved
- src/styles/: universal style configurations and constants
- src/App.js: main React component that acts as the root of the project
- buildCMSContent.js: helper script that moves content from
cmsContentinto thepublic/contentfolder, and creates - netlify.toml: netlfy's configuration file
- package.json: node's package manager configuration
Running Locally
- Having node is installed is pre-requisite for running the app locally
- Install the netlify cli
npm install netlify-cli -g - Install all dependencies:
npm install - Run
node buildCMSContent.jsto build the CMS content locally so you can see them during local development - Run
netlify dev - The application is now hosted statically on http://localhost:8888
Important: If new content has been added via CMS, rerun node buildCMSContent.js to see the latest content locally.
Adding a new blog
Log in to https://[your_website_name].netlify.app/admin and use the CMS to add a new blog.
Adding a new collection for the CMS
To add a new collection for your CMS (Blogs collection is setup by default), add to the configuration file in public/admin/config.yml. Read Netlify's Documentation for more guidance:
- https://www.netlifycms.org/docs/configuration-options/#collections
- https://www.netlifycms.org/docs/collection-types/
Make sure the folder field value is "cmsContent/<name>" where <name> is the value of the <name> field
Styling
The application is setup to use Chakra UI and @emotion/styled to handle styling. You can update and variants for Chakra UI components by updating the files in src/styles/. This will keep the theming of our Web App more consistent. Read for more info:
- https://chakra-ui.com/docs/styled-system/customize-theme
- https://chakra-ui.com/docs/styled-system/component-style
Functions
Netlify has a nifty feature called Neltify Functions. This allows you to host JS functions that can be triggered by and HTTPS request. We have one setup for you out of the box in netlify/functions. Try it out by visiting the following URL in your browser: https://[your_website_name].app/.netlify/functions/hello
If you want to add a new function, just add a javascript file to the netlify/functions/ folder, and the endpoint will be https://[your_website_name].app/.netlify/functions/<file_name>.